Since you are reading my blog, chances are that you are a .NET developer. Do you realise that eXtensible Application Markup Language (XAML) is now part of .NET? Are you familiar with it? How would you describe XAML (pronounced "zammel") to someone that is not familiar with it if you only had 10-20 minutes? Below is my take.
BackgroundXAML was introduced as part of Windows Presentation Foundation (WPF) which was released in November 2006 as part of .NET Framework v3.0. In addition, XAML is at the core of Silverlight, v2 of which will be released this year. Whilst XAML itself is independent of those two technologies, I am a practical person so I associate XAML with those two presentation technologies (WPF for the Windows desktop and Silverlight for the cross-platform browser) and have no qualms in intermixing those terms in this blog post. The XAML that Silverlight 2 will support is a subset of the XAML that WPF supports but the core principles and most capabilities are the same.
XAML is an XML language for describing a hierarchy of objects and their properties; in our concrete examples, it describes a hierarchy of visual objects that make up a Graphical User Interface (GUI).
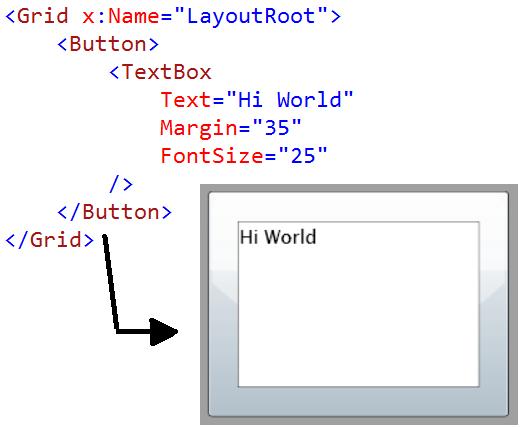
Relationship to managed codeAn important fact about the XAML elements (more precisely the WPF/Silverlight graphical system and controls) is that they are fully composable. For example, the following screenshot shows some crazy XAML that places a TextBox inside a button as its content (and in the bottom right corner the result):
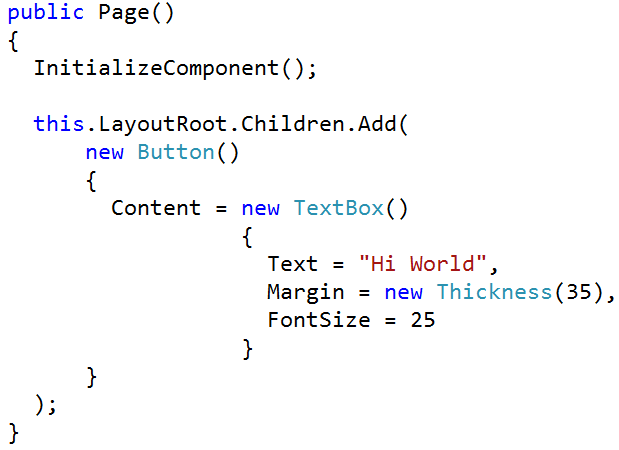
It is important to note that anything you can do with XAML, you can also do in code (C#, VB etc). For the previous example, the alternative code required is a single statement in the ctor:
Regardless of that important fact, it is our preference to use XAML for the (naturally) declarative part of describing a GUI. We then use code, of course, to programmatically react to user interaction with the GUI elements that were declared in XAML, i.e. we use code to capture the behaviour.
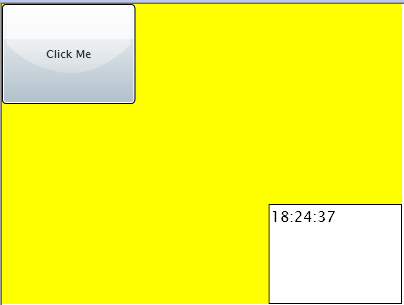
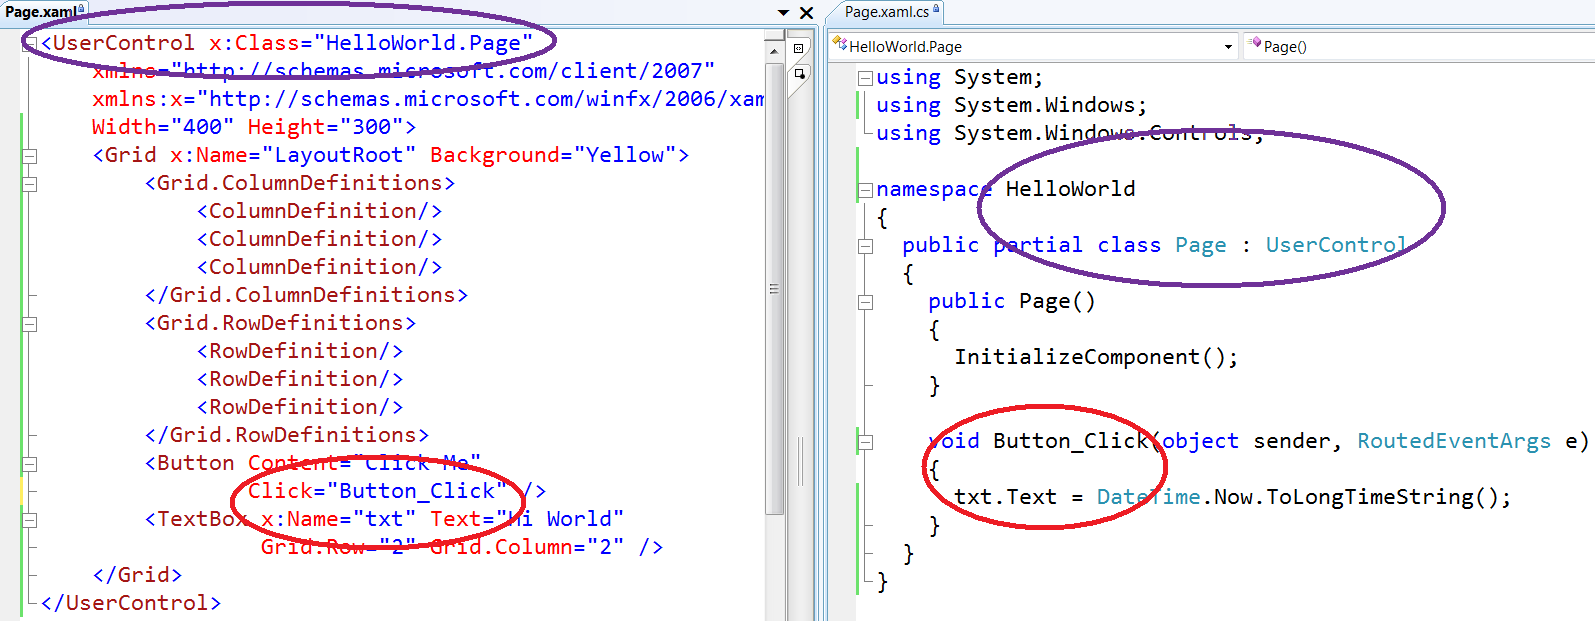
The obvious question that arises is how we connect the XAML bits to our managed code. In brief, the technique of partial classes ensures that the XAML bits and the managed code bits end up making a single class. XAML properties assign names to controls so we can reference them in the code-behind and, finally, XAML properties connect events in XAML to event method handlers in code. The following screenshot shows a GUI where clicking on the button, updates the time in the textbox.
Take a look at the combination of XAML and C# to achieve this.
 Tool Support and the Designer-Developer Workflow
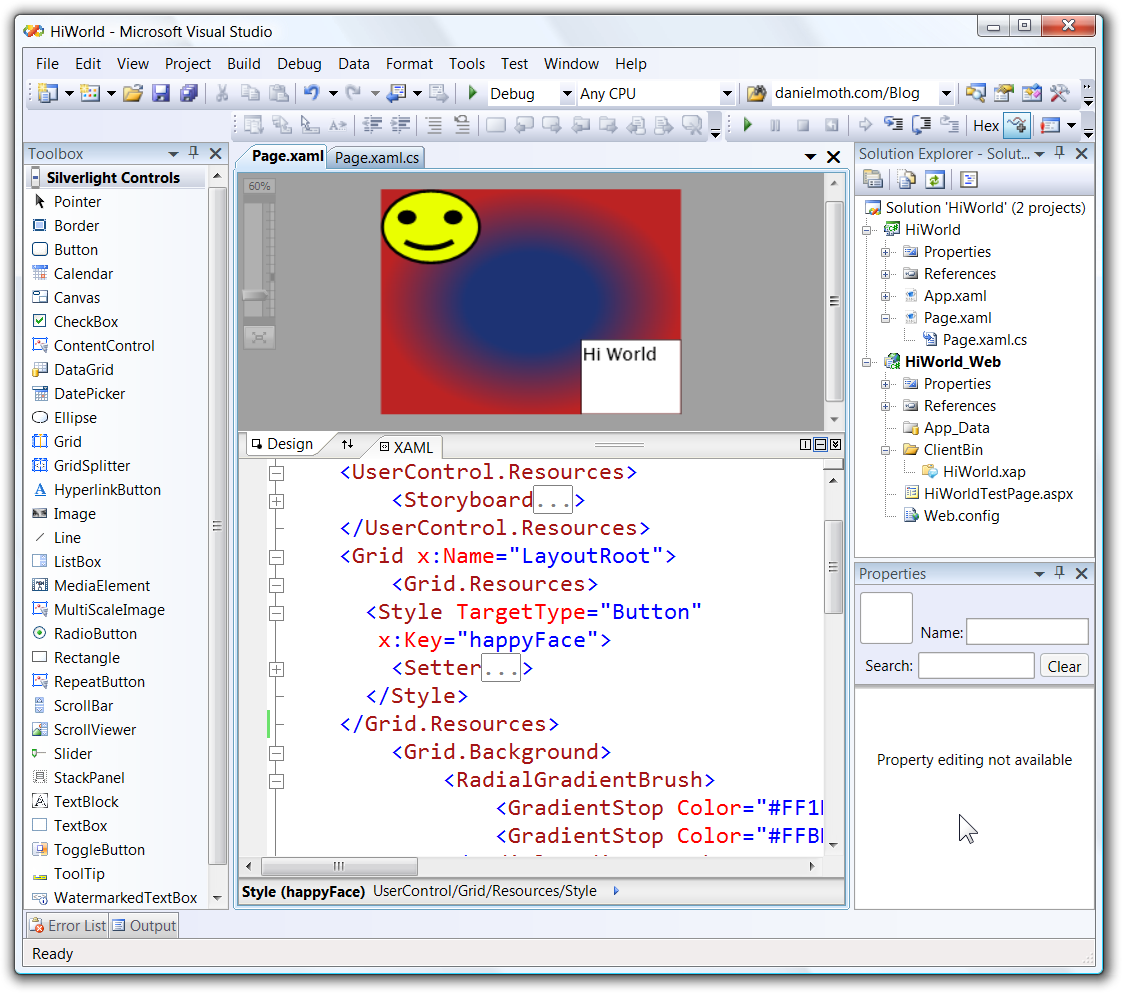
Visual Studio 2008 has a designer tool that allows you to type XAML (with full intellisense) and instantly see the results. For WPF projects it allows you to also drag and drop controls onto the surface and have the XAML generated for you. Have a look at this VS2008 screenshot of Silverlight designer.
For Silverlight 2, the VS2008 is just a read-only designer so you have to type things in the XAML pane or use an external tool to generate the XAML such as Expression Blend.
Expression Blend allows your designer friends to work on the same project/solution and more importantly on the same XAML that you, the developers, are working on.
Have a look at the screenshot of the exact same project you saw just now, but this time in Blend.

That is one of the reasons XAML is an XML-based language: XML is very toolable. Because of that we have a nice workflow between designer people in Blend and developer folk in VS2008, where there is no exchange of bitmaps or binaries but they are both truly working on the same asset: XAML files. The designer-developer interaction for WPF with XAML is
described in this paper.
In my relevant demo, I use Blend to style the Button, add a storyboard for animating it and changing the background color to the LayoutRoot to a gradient color. You can see glimpses of that in both of the above screenshots of VS2008 and Blend, so revisit them paying attention to the XAML parts.
Concepts Worthy of Further Exploration (MSDN links)If you are a seasoned .NET developer, you'll find that XAML/WPF/Silverlight introduce some new concepts. Below I list MSDN links to the top 5 areas I recommend you investigate – just follow the hyperlinks.
-
The Layout System. Note that from the list of layout panels, Silverlight 2 only supports Canvas, StackPanel and Grid. Explore all 3 by changing the LayoutRoot type and dragging various controls on it. This is a good time to grok
Attached Properties.
-
Dependency Properties. These are important to understand because they enable the following 3 equally important areas:
-
Animations (in my session I make a button fly around a bit when clicked).
-
Databinding (in my session I bind the results of a WCF call to a list).
-
Control Styling/Templating (in my session I change a button to look like a happy face)
Conclusion – XAML levels of competencyIf you have been ignoring XAML so far, I don't think you can afford to do so any longer. IMHO there are 4 levels of XAML competency:
Level 100 – truly
understand all of the above.
Level 200 – confidently
read XAML (e.g. as spat out by VS2008 or Blend).
Level 300 – be able to
type XAML yourself with an aim to create a structure of a bland GUI (setting basic properties and hooking events etc).
Level 400 –
create styles, templates, animations and set gradient colours by hand.