Sat, June 17, 2006, 05:32 AM under
Windows |
Vista
We looked at
glass in Vista previously so please read that to make sure we are on the same page and using the same terminology... I'll wait...
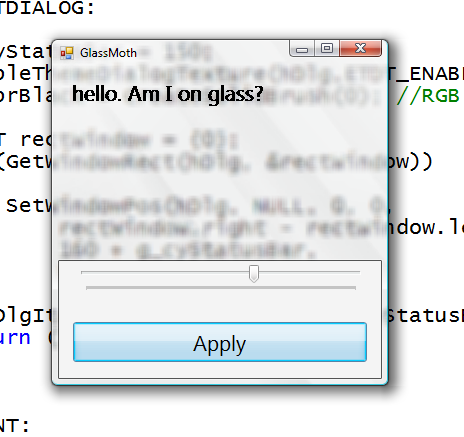
Great, now that you are back, let's see how to get glass in our C# applications. For starters, if glass is supported and enabled on the user's PC, then your non-client area will by default get the glass effect. In other words, the titlebar and borders will have glass (nothing more for you to do). The question is how to extend that into the client area like other OS applications do (as we
saw last time).
There are 3+1 things we need to do:
1. Check that it is supported before proceeding further.
2. Extend the frame into the client area.
3. Paint the extended area black.
Optionally,
4. Allow the user to drag our window by pressing in the glass area as if they were pressing on the window's caption bar.
So let's go!
1. First, let's make sure we are not on a legacy OS:
    if (Environment.OSVersion.Version.Major < 6)
    {
        Debug.WriteLine("How about trying this on Vista?");
        return false;
    }
After that, we need to check that glass is enabled by using the
DwmIsCompositionEnabled API which resides in
Desktop Window Manager (dwmapi.dll)
    // [DllImport("dwmapi.dll")]static extern void DwmIsCompositionEnabled(ref bool pfEnabled);
    bool isGlassSupported = false;
    DwmIsCompositionEnabled(ref isGlassSupported);
    return isGlassSupported;
2. Extending the frame requires setting up a
margins structure and passing it to another DWM API:
DwmExtendFrameIntoClientArea.
So if we want to extend a bit from the top of the window(i.e. we don't care about extending from the bottom, left or right sides) we can use the following code:
    // [DllImport("dwmapi.dll")]static extern void DwmExtendFrameIntoClientArea(IntPtr hWnd, ref Margins pMargins);
    Margins marg;
    marg.Top = 20; // extend 20 pixels from the top
    marg.Left = 0;
    marg.Right = 0;
    marg.Bottom = 0;
    DwmExtendFrameIntoClientArea(this.Handle, ref marg);
3. If you run your winforms app now, you'll find a black strip at the top. This is where we need the alpha blending and using a black brush does just that (tricking GDI that has no notion of an alpha channel).
So, in your form's paint event handler add the following code:
    SolidBrush blackBrush = new SolidBrush(Color.Black);
    g.FillRectangle(blackBrush, 0, 0, this.ClientSize.Width, marg.Top);
4. Moving the form programmatically can easily be achieved by catching the mouse down/up/move events and some simple logic but instead we can use the following magic:
// make windows do the work for us by lieing to it about where the user clicked
protected override void WndProc(ref Message m)
{
    base.WndProc(ref m);

    if (m.Msg == 0x84 // if this is a click
        && m.Result.ToInt32() == 1 // ...and it is on the client
        && this.IsOnGlass(m.LParam.ToInt32())) // ...and specifically in the glass area
    {
        m.Result = new IntPtr(2); // lie and say they clicked on the title bar
    }
}

private bool IsOnGlass(int lParam)
{
    // get screen coordinates
    int x = (lParam << 16) >> 16; // lo order word
    int y =  lParam        >> 16; // hi order word

    // translate screen coordinates to client area
    Point p = this.PointToClient(new Point(x, y));

    // work out if point clicked is on glass
    if (y < marg.Top)
        return true;

    return false;
}
5. There is no 5 :-) Just as a gotcha, if you decide to extend the client frame after the form has been displayed (and hence its handle has been created), you should call
this.RecreateHandle();
Note that there are other simpler approaches that use winforms Transparency but they seem to suffer from a very undesirable effect: When the user clicks on the glass area they are actually clicking on whatever is behind the form (true transparency is not what we want here).Download a complete sample
here.