Fri, November 6, 2009, 08:54 PM under
ParallelComputing |
HPC
If you are developing MS MPI applications with Visual Studio 2010, you are probably tired of following some tedious steps for every new C++ project that you create, similar to the following:
1. In Solution Explorer, right-click YourProjectName, then click Properties to open the Property Pages dialog box.
2. Expand Configuration Properties and then under VC++ Directories place the cursor at the beginning of the list that appears in the Include Directories text box and then specify the location of the MS MPI C header files, followed by a semicolon, e.g.
C:\Program Files\Microsoft HPC Pack 2008 SDK\Include;
3. Still under Configuration Properties and under VC++ Directories place the cursor at the beginning of the list that appears in the Library Directories text box and then specify the location of the Microsoft HPC Pack 2008 SDK library file, followed by a semicolon, e.g.
if you want to build/debug 32bit application:
C:\Program Files\Microsoft HPC Pack 2008 SDK\Lib\i386;
if you want to build/debug 64bit application:
C:\Program Files\Microsoft HPC Pack 2008 SDK\Lib\amd64;
4. Under Configuration Properties and then under Linker, select Input and place the cursor at the beginning of the list that appears in the Additional Dependencies text box and then type the name of the MS MPI library, i.e.
msmpi.lib;
5. In the code file
#include "mpi.h"
6. To debug the MPI project you have just setup, under Configuration Properties select Debugging and then switch the Debugger to launch combo value from Local Windows Debugger to MPI Cluster Debugger.
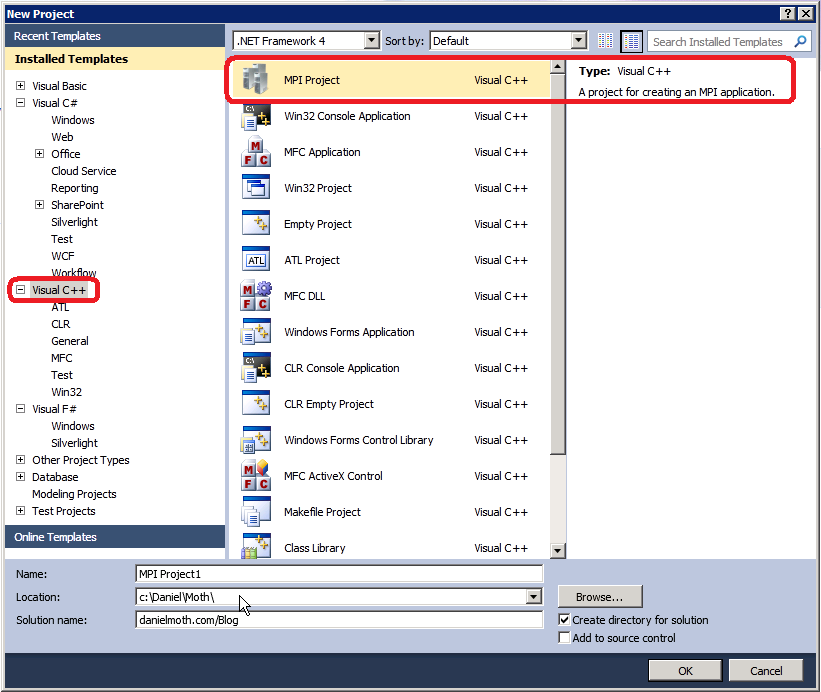
Wouldn't it be great if at C++ project creation time you could choose an
MPI Project Template that included the steps/configurations above? If you answered "yes", I have good news for you courtesy of a developer on our team (Qing).
Feel free to download from Visual Studio gallery the
MPI Project Template.